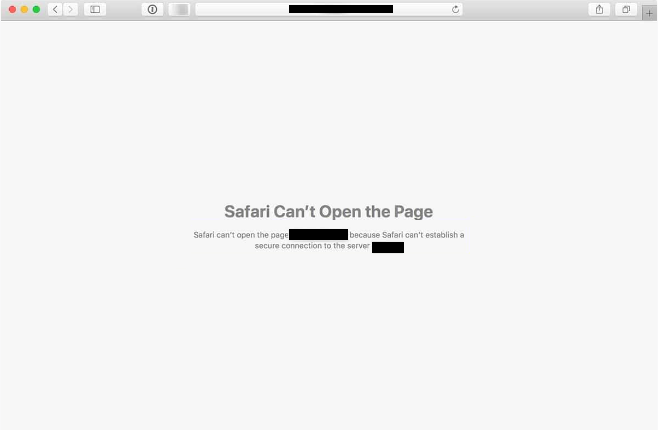
When browsing using the Safari browser on your Mac, you may eventually come across the “Safari Can’t Establish a Secure Connection” error. In some cases, only one website may be affected by this error.
It can be a frustrating error to deal with because it can be triggered for a couple of reasons. Only you can find out what’s causing it in your case so we recommend trying all listed “Safari Can’t Establish a Secure Connection” error solutions until you come across one that works.
Clear your browser data
In some cases, the “Safari Can’t Establish a Secure Connection” error can be caused by a site’s outdated information. The quickest way to check is to clear your browser cache. Keep in mind that following the provided instructions will delete all of your browsing data, including history.
1. Open Safari.
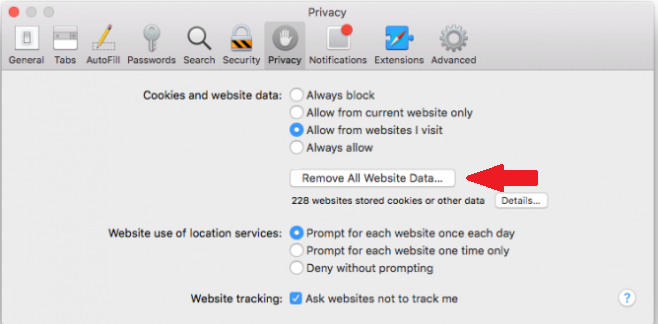
2. Click “Safari” in the menu at the top, select “Preferences”, then click “Privacy”.
3. Under “Cookies and website data”, click “Remove All Website Data”.
4. Click “History” in the menu at the top and click “Clear History”.
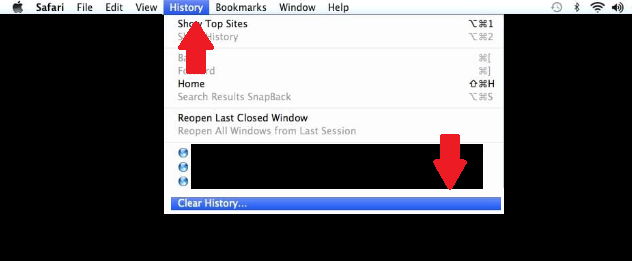
This will clear all browsing data. Try accessing the site showing the “Safari Can’t Establish a Secure Connection” error to see whether this solved the issue.
Change your DNS settings
If clearing browsing data did not solve the issue, changing your DNS settings might do the trick. DNS (Domain Name System) is essentially like a phone book of the Internet. It turns domain names into IP addresses, which browsers then use to load websites. If there are issues with your DNS settings, it could very well trigger the “Safari Can’t Establish a Secure Connection” error.
Use the following instructions to change your DNS settings:
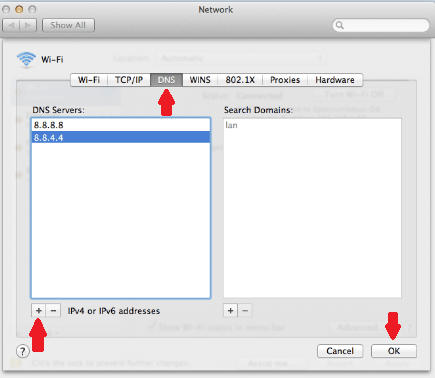
1. Open System Preferences and click Network.
 2. In the Network window, click “Advanced”, and then open the “DNS” tab.
3. Remove the DNS Server(s) by clicking the “-”.
4. Click the “+” and type “8.8.8.8”.
5. Click the “+” and type “8.8.4.4”.
6. Click “OK”.
7. Restart your browser and check whether the “Safari Can’t Establish a Secure Connection” error has been fixed.
Uninstall/Disable browser extensions
It’s possible that an extension is conflicting with Safari, causing the “Safari Can’t Establish a Secure Connection” error. In most cases, it’s extensions related to anti-virus or security that trigger this error. If the above solutions did not solve the error, try disabling your extensions one by one to see whether that solves the error.
1. Open Safari → Preferences → Extensions.
2. Select an extension and click “Uninstall”.
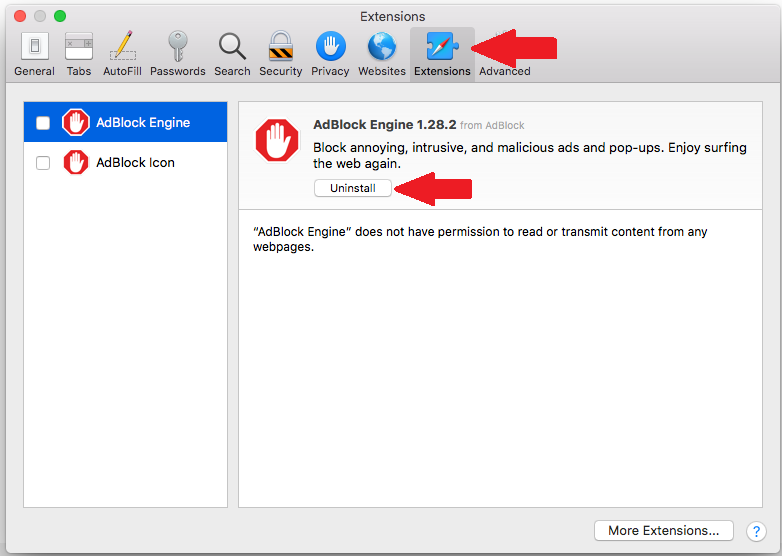 Remove the extensions one by one until the “Safari Can’t Establish a Secure Connection” error no longer appears.
Check the date and time
It may seem completely unrelated but having the incorrect date and time on your Mac can cause problems with Safari, including the “Safari Can’t Establish a Secure Connection” error. This is a fairly simple issue to fix.
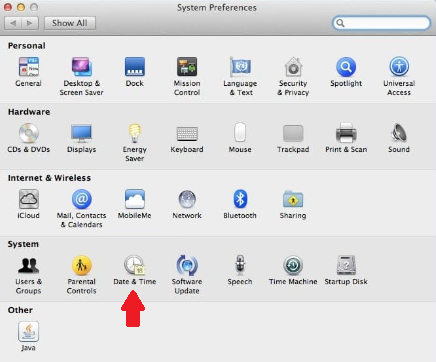
1. Open System Preferences and click “Date & Time”.
2. Click the padlock icon and enter your password.
3. Check the box “Set date and time automatically” if it’s unchecked.
If incorrect date and time were what caused the “Safari Can’t Establish a Secure Connection” error, this should solve it.
Set the keychain to trust the certificate
It’s possible that the reason for the “Safari Can’t Establish a Secure Connection” error is Safari not trusting the site’s certificate and thus refusing to open the site to protect you. If you’re absolutely certain that the site is safe, you can force the keychain to trust the certificate, thus bypassing Safari’s block.
1. Open Finder → Applications → Utilities → Keychain access.
2. Go to “System”, then “All Items”.
3. Find the website you’re trying to visit and double-click on it.
4. From the dropdown menus under “Trust”, choose “Always Trust”.
Disable IPv6
Before trying this step, if possible, try accessing the site using another Wi-Fi network to see whether you can access it without issue. If the site loads normally on a different Wi-Fi network, try disabling IPv6.
1. Open System Preferences → Network.
2. Click on the “TCP/IP” tab.
3. From the Configure IPv6 dropdown menu, select “Manually”.
4. Click “OK”.
